Last time we looked at Mixing Boards. Today, it’s outboard processing gear. There’s a lot of info in this one, I know you keeners will make it to the end!
There’s a huge range of outboard gear that lets the recording and mixing engineers tailor and manage the sounds being recorded, or those that have already been recorded.
Equalizers?
One of the most powerful tools used to tailor the sound is the Equalizer (EQ). Most people are somewhat familiar with these – they work in the same way that tone controls on other gear work: you can turn up certain frequencies, or turn them down. Simple. Sure, simple until you have 32 different frequency ranges you can adjust (called a 32-band EQ); and then add in a parametric function and it tends to blow minds. Parametric EQs let you dial the specific frequency you wish to alter, rather than being fixed to specific ones. You can also dial in how broadly or narrowly the EQ range functions. For instance, you can zero in a really tight curve and surgically remove one annoying sound; or you can broaden the range and apply a nice sounding boost to the entire range of, say, a singer’s voice. The flexibility is astounding!
Here’s a picture of a dual 32-band EQ:
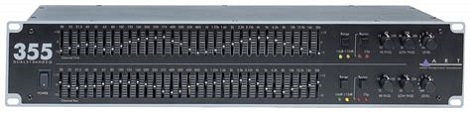
You can see how each channel is set differently.
EQ plays a huge role in making recorded music sound its best.
Compressors?
Compressors are really interesting things. As the name suggests, they compress the sound. Unlike MP3 compression in order to make a file smaller, a studio compressor makes the loudest sounds quieter, and the quietest sounds louder. It’s very useful to modify the dynamics of the music. A good example is a singer who belts out the big notes, then lays back and almost whispers the quietest ones. Here’s a classic example of this, courtesy of Mr. Conway Twitty. Listen how he goes from full force gale to a croaky whisper:
Can you hear how the whispery “quiet” part is actually louder sounding than the full-voice belting part on the record? That’s classic compressor use. As I’ve mentioned elsewhere, the big loud sound could overload the system, creating distortion, and if you simply turn it down then it’s hard to hear the quiet parts. Before compressors there would be people with their hands on the mixing board sliders manually pulling them down and sliding them up as required.
You can adjust the behaviour of the compressor too, telling it what volume level you want it to kick in on and how much you want to squeeze it all. Art and a fine ear are needed to set these best. Plus, compressors can be used in other ways to tailor the overall sound in addition to the loudness. This starts to get into rarefied skills, and frankly I can’t even tell you how to set a compressor properly, it’s that abstruse.
Preamps?
You see the word AMP in there? Preamps are amplifiers that boost signals to a level where most common electronic devices can actually work with them. Microphones, as you can imagine, put out a wee tiny signal which needs to be strong enough so the mixing board and other gear can actually work with it. And, as the first thing that mics and other signals see in the overall chain of things, preamps are vital to the quality of the sound. If they are bad, no amount of lipstick will make things sound better.
Preamp sound quality varies widely, and mostly correlates with price. You can use the best Neumann mic, and if it’s going into a crappy preamp, say you plugged it into a portable radio, it will sound terrible. In this case we’re using outboard preamps, as shown below:
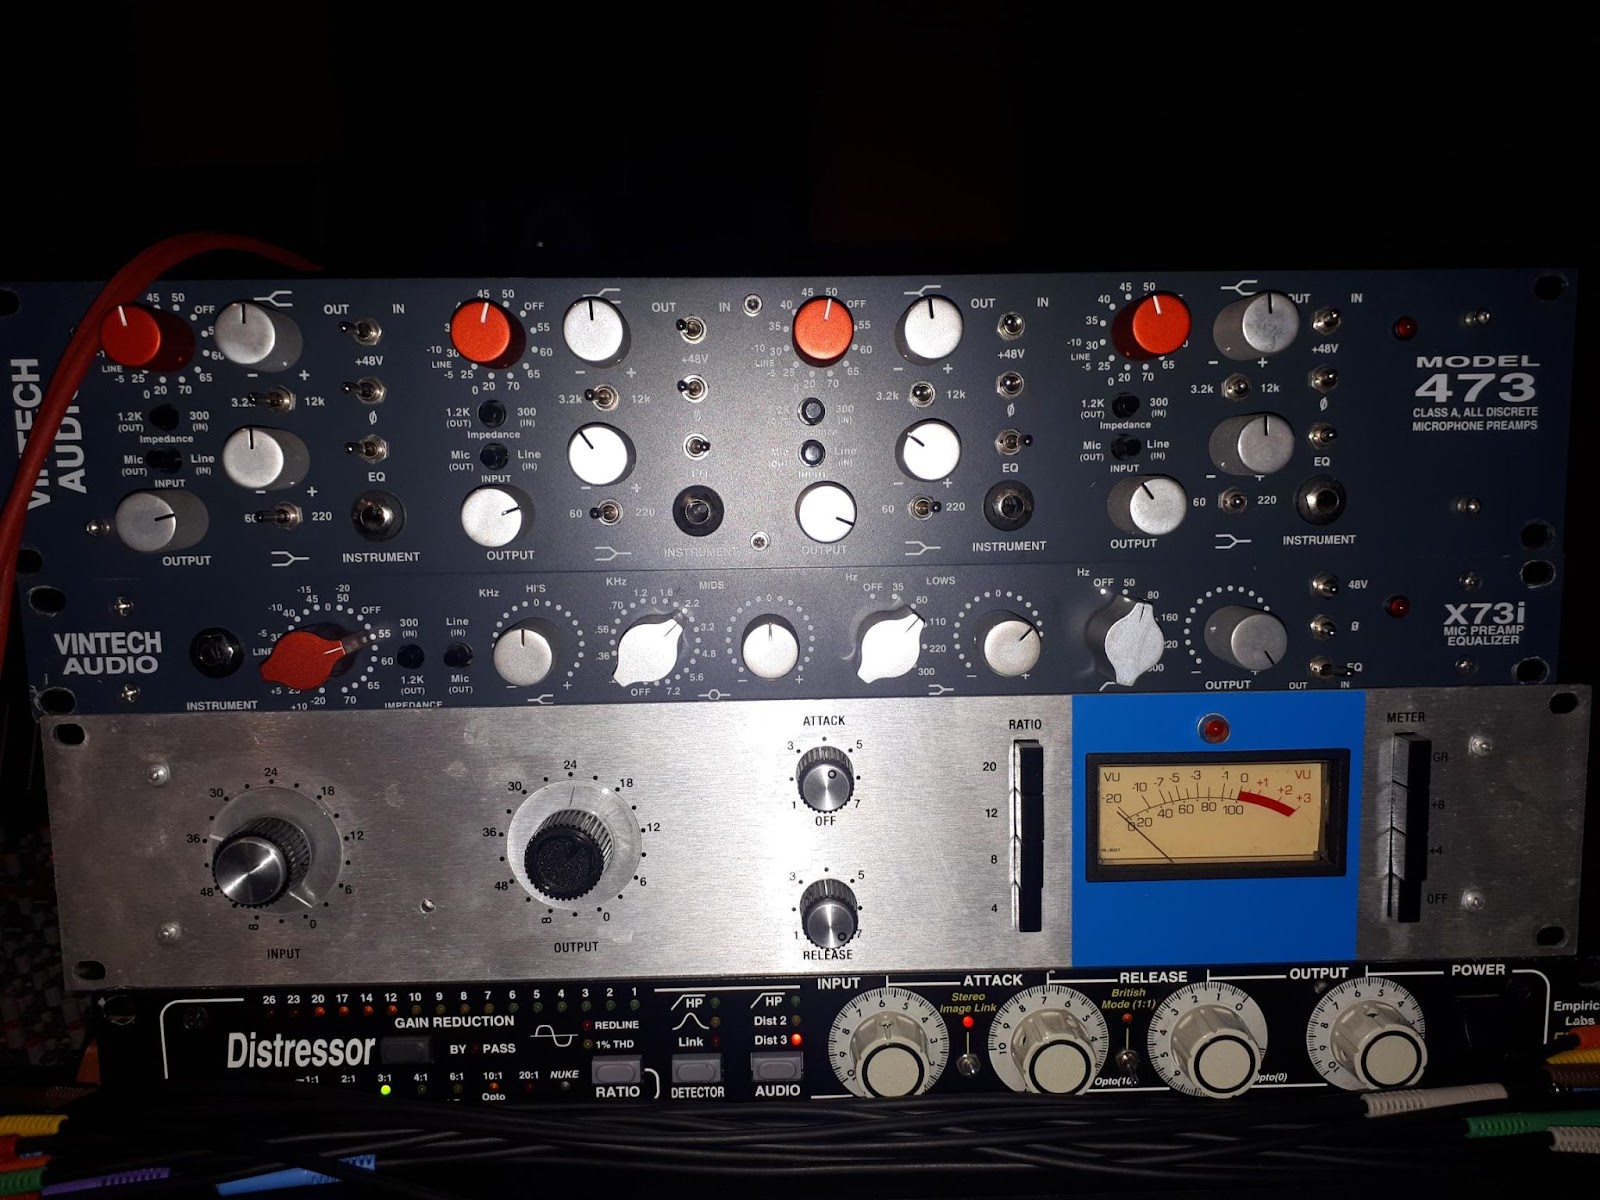
You can see the preamp, at top, still has a bunch of tone controls and other controls to make sure the sound gets into the system cleanly and clearly.
The middle box is a mic preamp equalizer which has some parametric equalization options.
The bottom silver box is a basic compressor with simple-looking settings. It’s actually a little more tricky to get right than it looks.
The bottomest black Distressor is another compressor, and I do not have a clue how to use that one!
Microphones?
A good studio has a wide range of microphone choices. There are purpose-built mics for drums so they can handle the loudness, all the way to super-sensitive ribbon mics with a diaphragm so sensitive that some people cover them when they are simply walking with them to keep the sensitive foil ribbon from breaking! There’s a whole bunch of mic lore and variety which I won’t be getting into here. Ask me or search it up if you wish to learn more.
Part of the strength of having a big mic cabinet is being able to match the right mic to the sound, especially on voices. We’ve found a mic that sounds great on my voice, for example, and even more expensive “better” mics don’t sound as good.
You’d think that by now all electronics would be sonically transparent, yet that is a very difficult goal to attain. Even the best gear “colours” the sound, and in the best gear those colourations are pleasing and actually add to the recording.
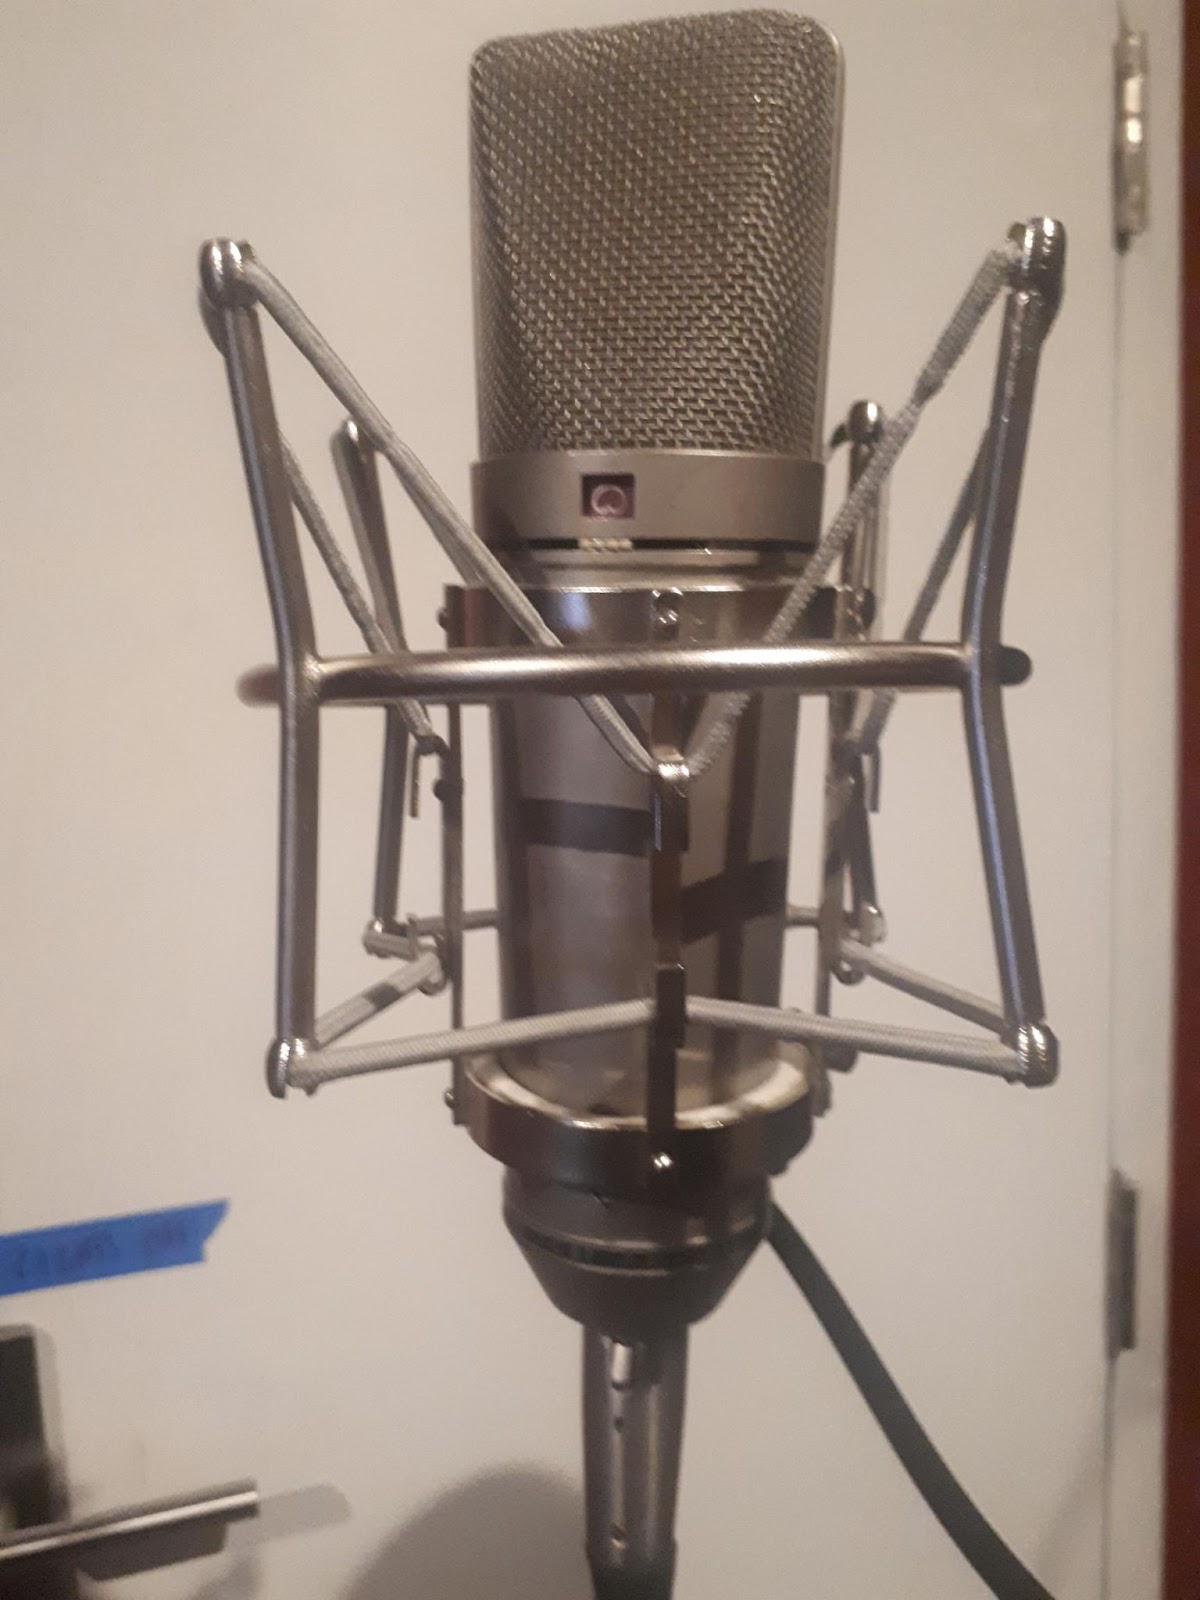
Here’s a shot of the venerable Neumann U87 mic. You’ve heard it many times on your favourite records, I’m sure. You won’t be hearing it on my voice on this record though!

This is a mic in a shockmount that stops vibrations and sounds from physically assaulting the mic. Good mics are so sensitive they can hear a bus going by a block away! And don’t even talk about toe-tapping!
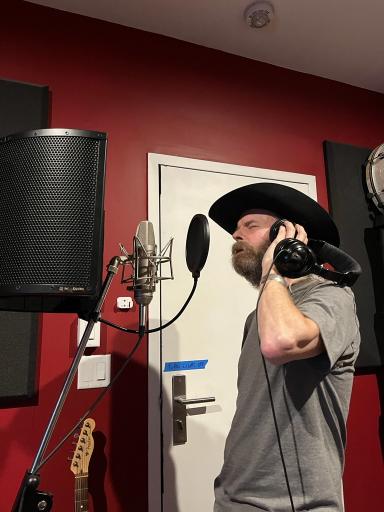
Shown here is a cowboy (all hat, no cattle!) singing into that round black screen you always see in front of mics. That’s a pop filter. As the name suggests, it helps tame the pops that come with singing letters like “P” and “B”. It also keeps spit off the mic. We’re talking thousands of dollars for high-end mics like these!
Nice hat!
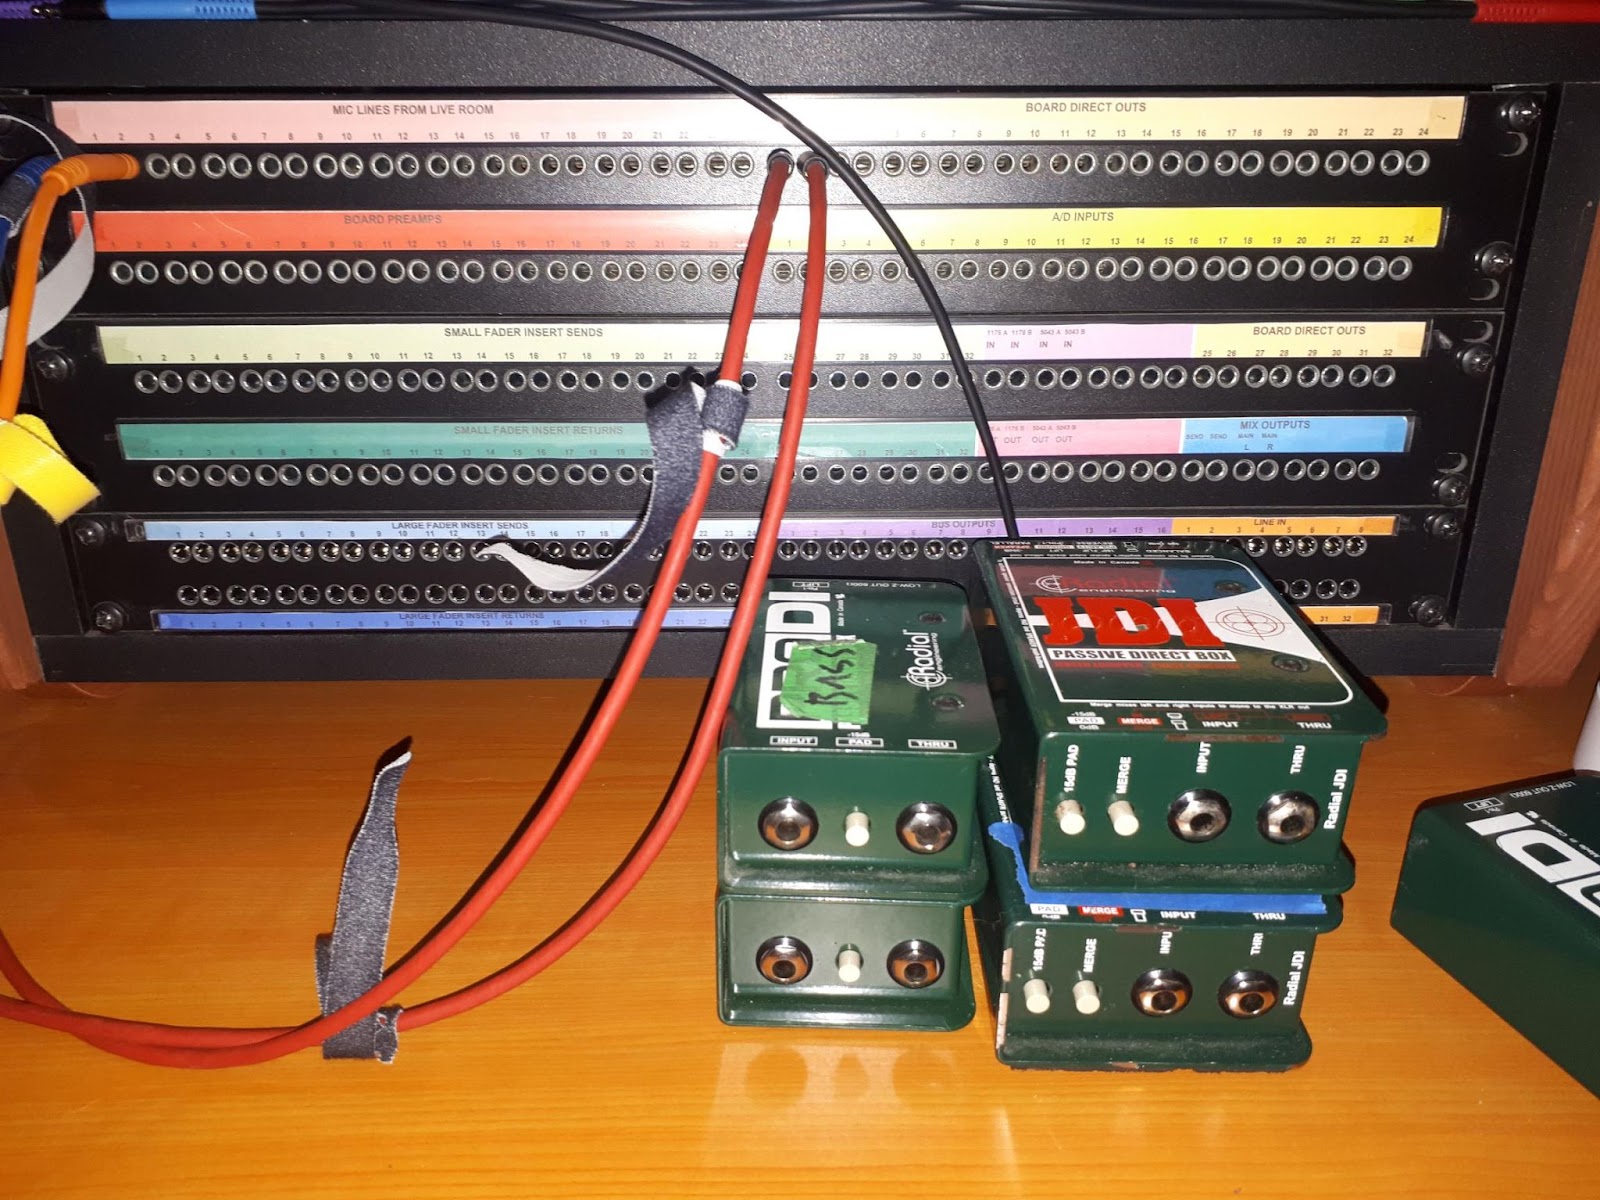
Patch Bay?
A patch bay is one of the most useful things in a studio. Pretty much all the studio cables are plugged into the back, then you use the front jacks to send that signal where you want it. There are miles and miles of cabling in a studio, and crawling around behind stuff plugging cables in and out would take most of your time!
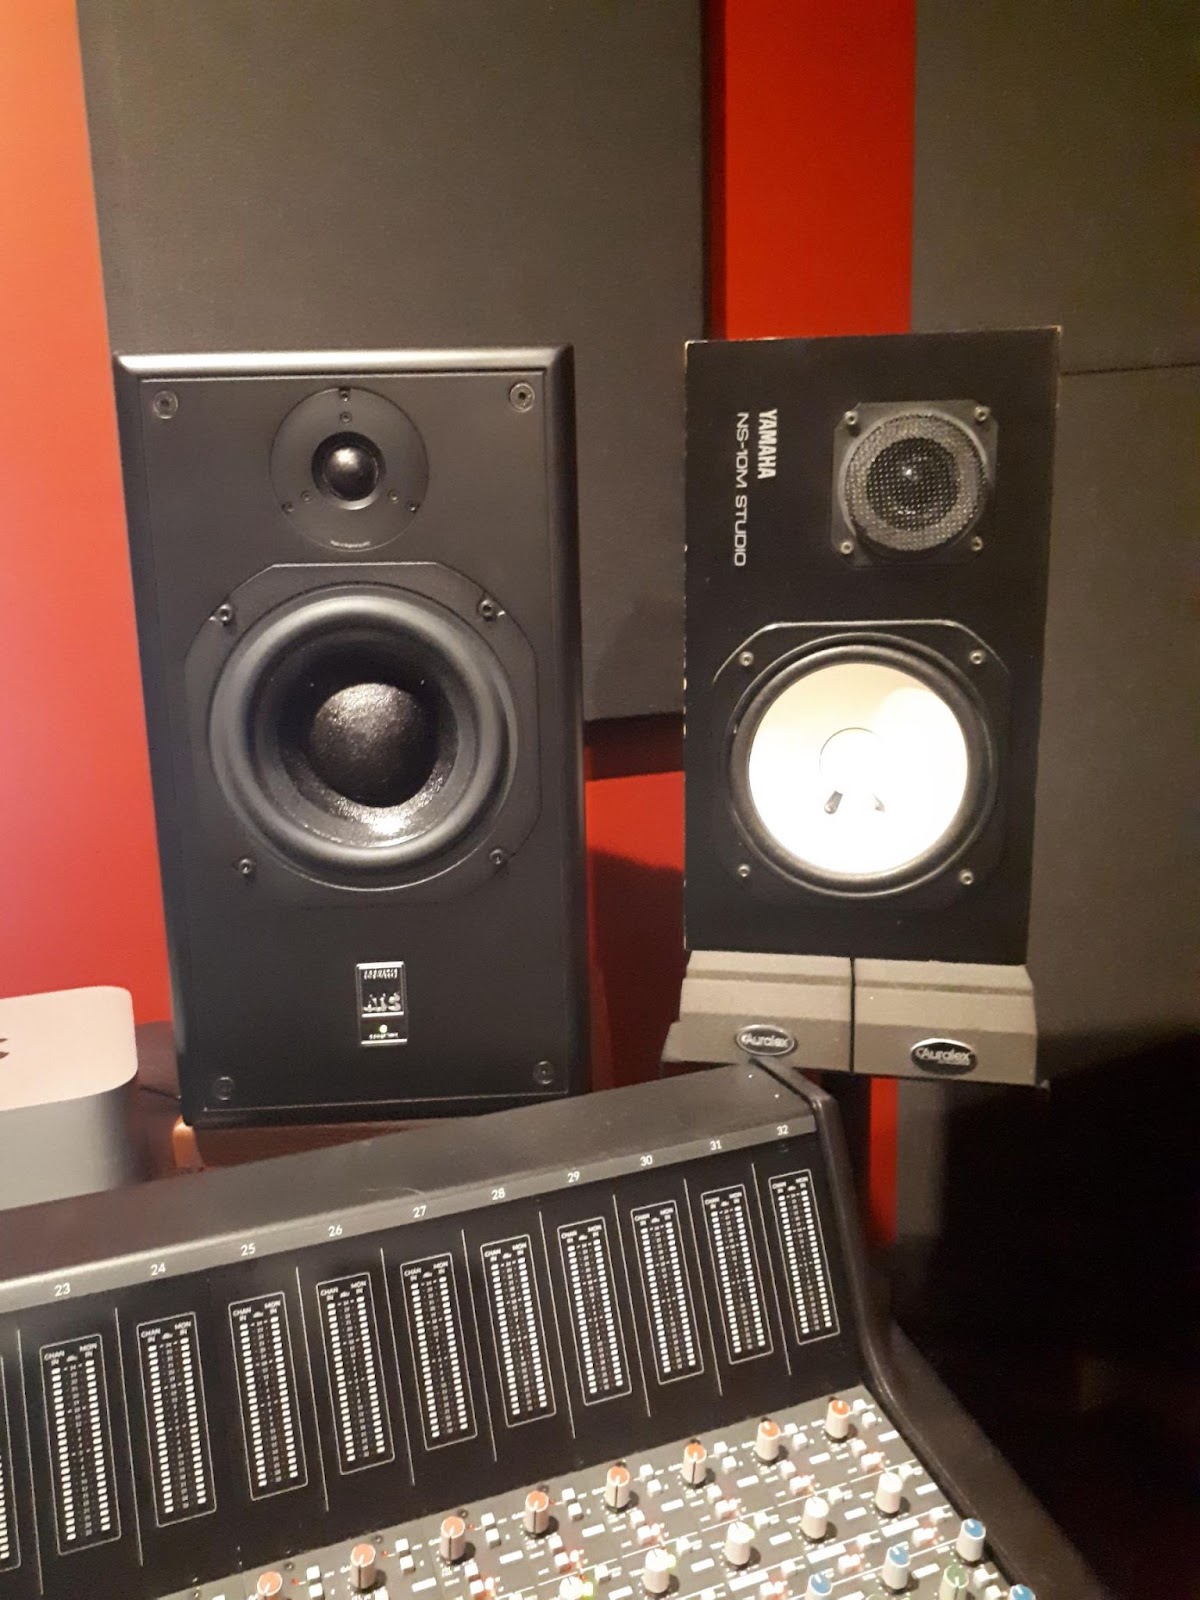
Monitors!!!
Last, and certainly not least, you need to be able to hear everything, and you need to be able to hear it cleanly and accurately. High quality speakers, called Studio Monitors, are the ticket! (Beware: manufacturers often call their speakers “studio monitors,” when they may be the last speaker any pro would install in their control room!)
You can see we’re working with two different types of monitors. This lets us check the sound on different-sounding speakers to make sure it’s all working right. As I said above, most equipment changes, or colours, the sound, and speakers are where the biggest differences can come in. It’s vital to get the best monitors you can for your studio.
That said, most people don’t listen to music on high quality speakers, so it’s important to listen to mixes on a variety of playback systems. One of the favourites for mixing engineers is still listening in the car. Some use boom-boxes. Another trick is to leave the room and listen from down the hallway. It’s surprising how much is revealed in these lo-fi ways!
Let’s Get Virtual!
I’ve talked about mixing in the box, or inside the computer. It would partially defeat the point, and would create a cabling nightmare, if you were to connect too many outboard devices to your computer. The solution that has developed is using Virtual Devices, called Plug-ins.
You can get just about any outboard device in a modelled plug-in now. They work really well, though they may not always capture the sound of the original physical device, leading many engineers to continue using real boxes on important sections. In fact, there’s one compressor that sounds so good that people will insert it into a signal chain and turn all the settings off simply to get the sound of the actual electronics!
Here’s a link to Universal Audio, purveyors of some of the most famous outboard gear around. They have recently released virtual plug-ins of their favourite products.
https://www.uaudio.com/uad-plugins.html
Next post: Musicians and More!
Thanks for being my fan!
John